This integration connects The Customer Factor (TCF) to ServiceVault Pro (SVP) using Zapier, so every new prospect you add in TCF is automatically created in SVP within seconds — no manual data entry required. This keeps your sales pipeline and service records in sync without switching between apps.
-
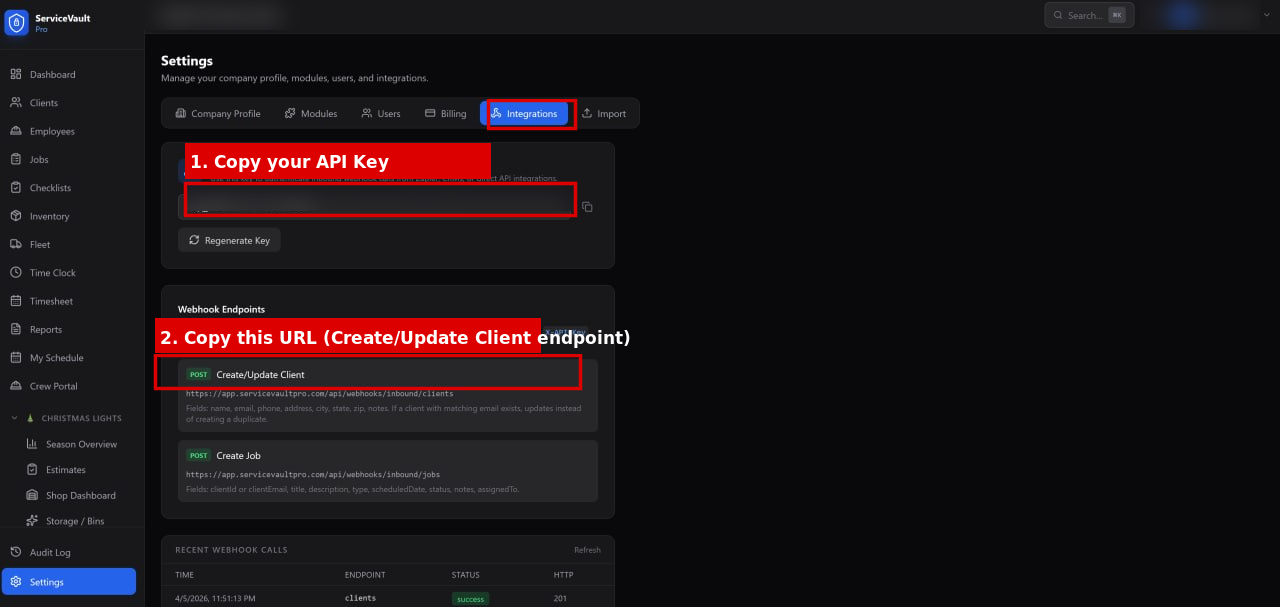
In SVP, go to Settings in the sidebar, then click the Integrations tab. Find your API Key and Webhook URL. Copy both values and keep them handy.
-
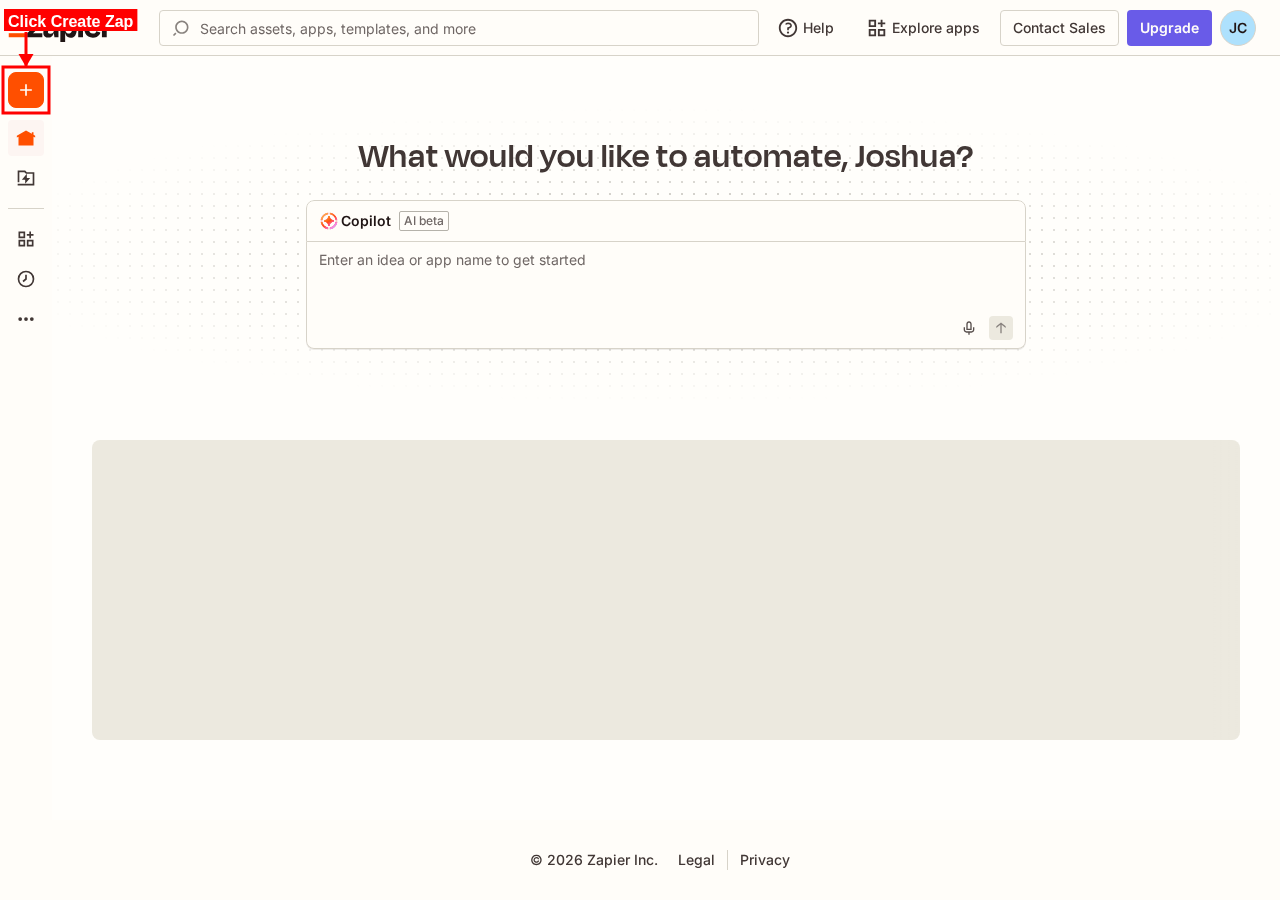
Log into zapier.com. Click Create and select Zap.
-
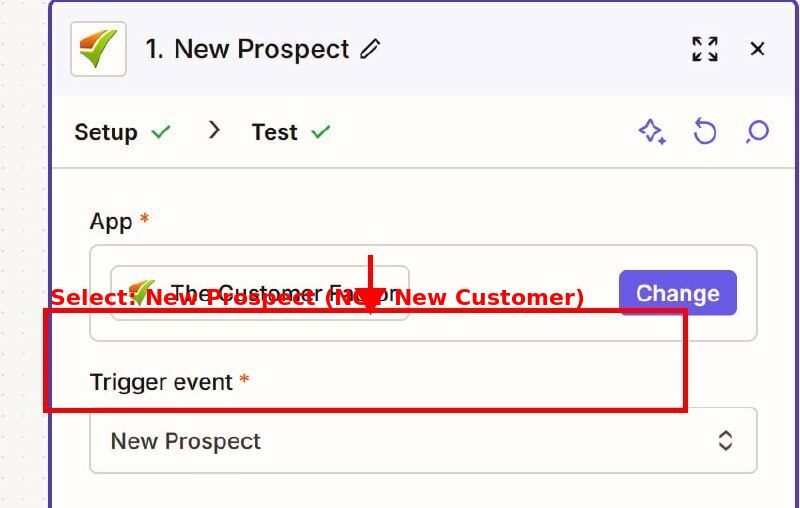
In the Trigger step, search for The Customer Factor. For Trigger Event, select New Prospect.
Important: Use New Prospect — NOT New Customer. This ensures every new prospect added in TCF is immediately synced to SVP.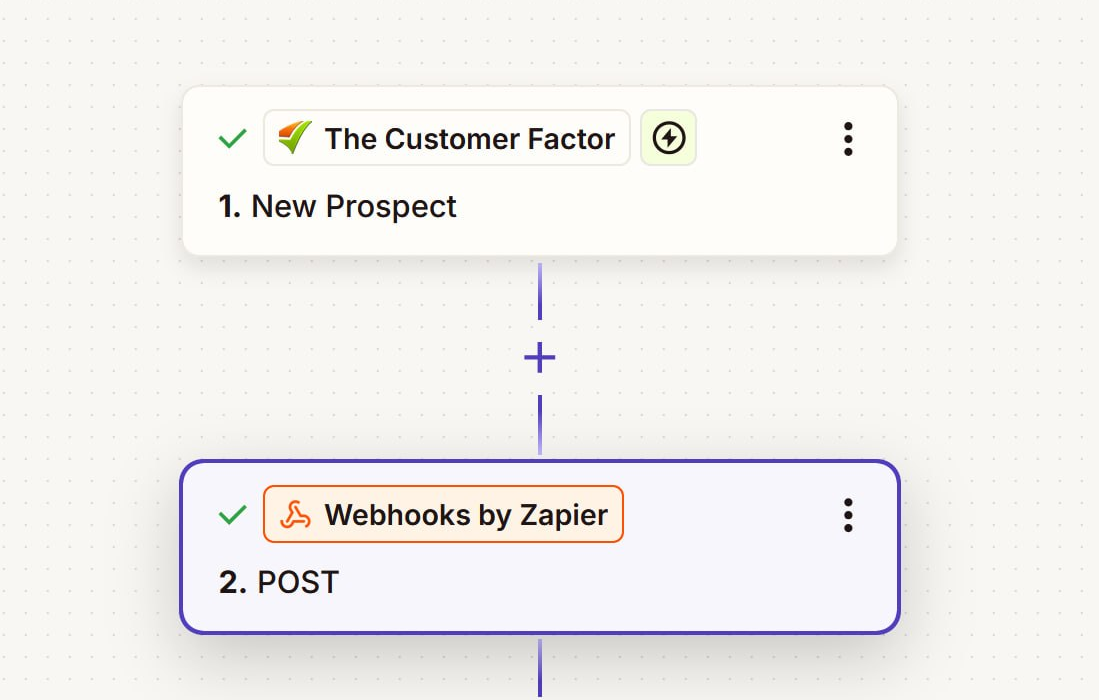
-
Connect your TCF account if prompted. You may need your TCF API key, which can be found in TCF Settings. After connecting, click Find new records to load a sample prospect to use for testing.

-
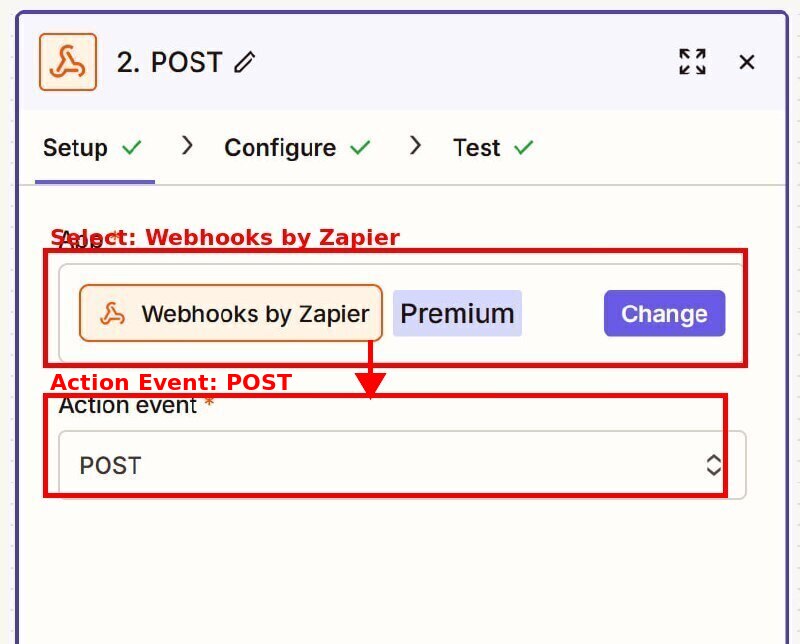
In the Action step, search for Webhooks by Zapier. Select POST as the Action Event.
-
Configure the webhook:
- URL — paste your SVP Webhook URL copied in Step 1
- Payload Type — set to JSON
Important: Payload Type MUST be set to JSON. Do not use Form. Using Form will cause the webhook to fail silently with no error message.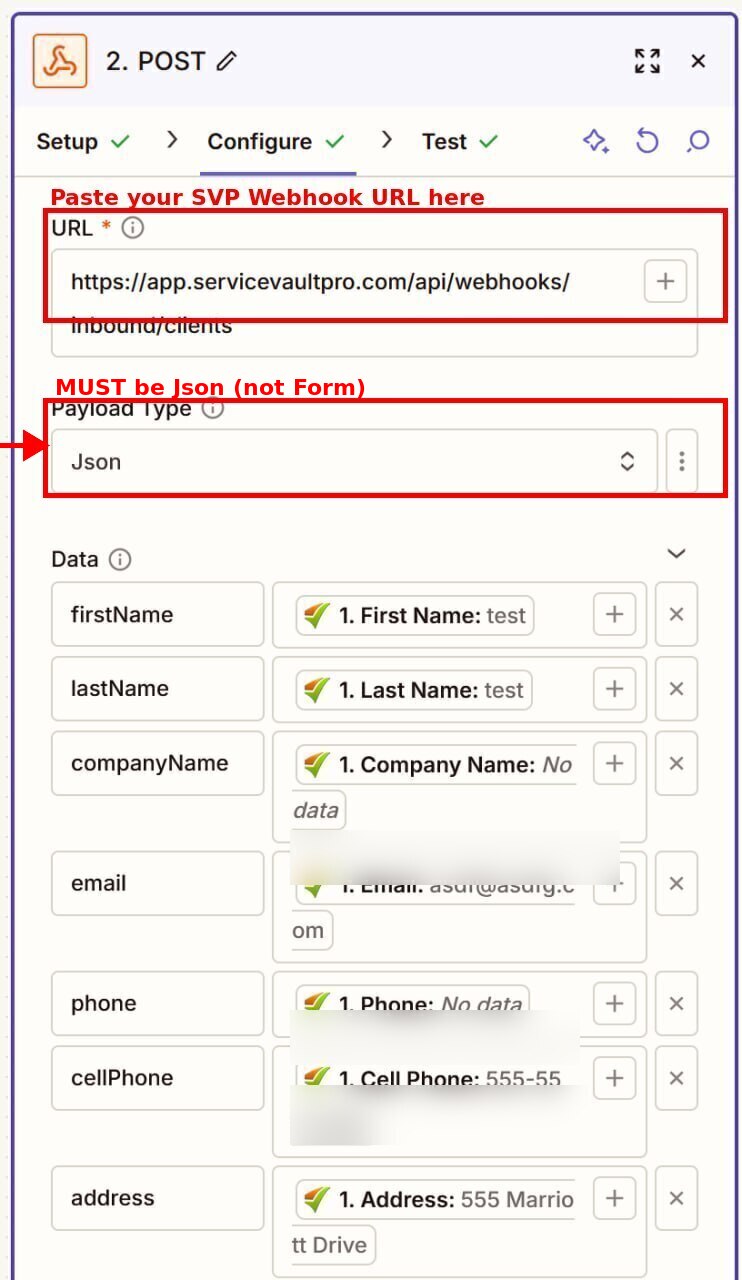
-
Scroll to the Headers section. Add one header:
- Key:
X-Api-Key - Value: your SVP API Key copied in Step 1
Note: This is your SVP API key from Settings > Integrations, NOT your Zapier API key.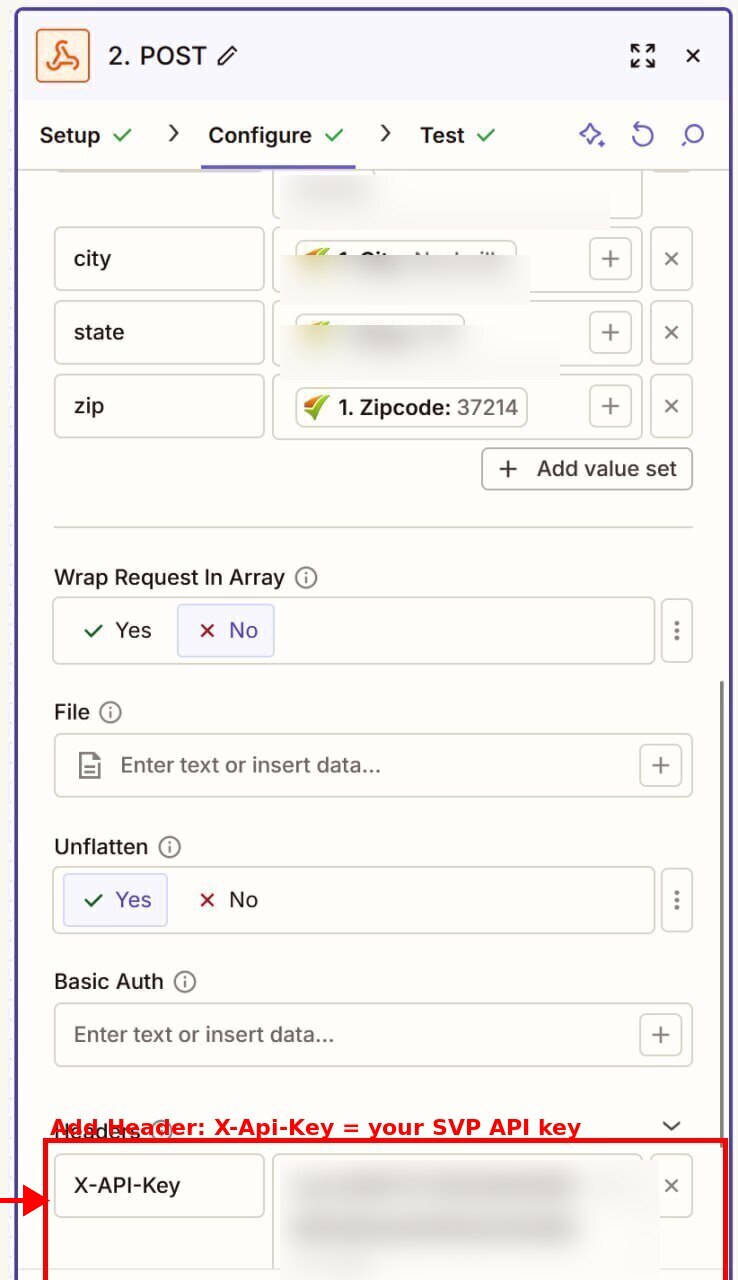
- Key:
-
In the Data section, map the following TCF fields to the corresponding SVP keys:
firstNamelastNamecompanyName(optional)emailphonecellPhone(optional)addresscitystatezip
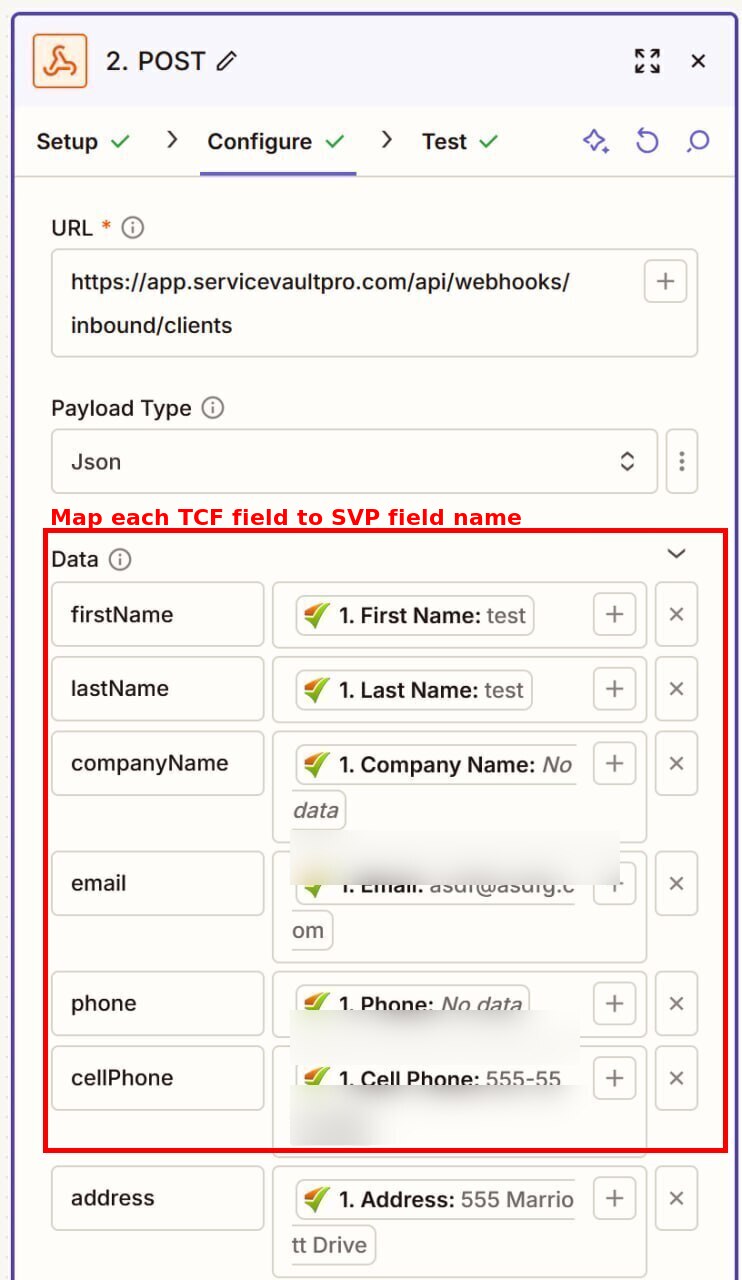
Click the + button next to each key to open the field picker and select the matching TCF field from the previous step's output.

-
Click Test Step. After a successful test, go to Clients in SVP and find the test prospect — it will display a Prospect status badge.
Note: If the test fails with a 401 error, verify that the X-Api-Key header value matches exactly what is shown in SVP Settings > Integrations.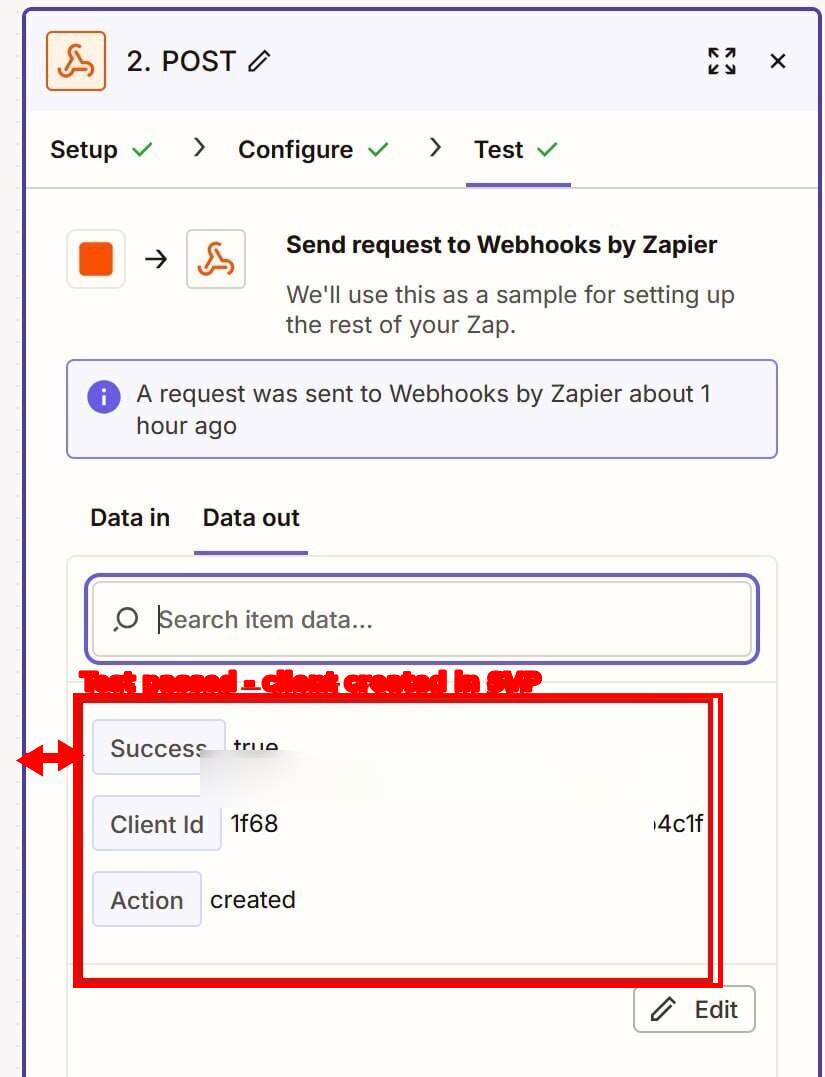
-
Click Turn on Zap. Every new prospect added in TCF will now automatically appear in ServiceVault Pro within seconds.